Pages

Monday, July 1, 2013

Coat Closet Conquering!

Coming home after a long day at work,  your arms are laden with bags from your stop at the grocery store, a lunchbox with food you hope will still be good for tomorrow's lunch because today you barely had time to get to the restroom let alone try to actually eat anything, school bags with student work you hope to finally look at tonight, your purse and who can forget the coat you're wearing. Dumping your cargo in various locations, you're finally down to the coat layer. Peeling off this piece of protective, warmth you open the door to find yet another obstacle. The. coat. closet. jam. Wedging your coat into the mass of stuff, you vow, "I'll get to it this summer." The voice in your head being the ever constant reminder of what needs to get done.

Guess what...summer is finally here! That means it is time to keep the promise I made to my head-voice and actually take care of the coat close jam. This project came up on a whim one night. Hubbs was relaxing, I was relaxing, the girls were...well, they were around somewhere. Now that they are 12 and 15, they often have their own ideas on what they want to do and it usually involves their bedrooms and technology. If they could figure out how to spend part of the time in their rooms cleaning them, well, I'd be one happy Mama. :) But I digress.

So Hubbs and I were relaxing and I asked him what he thought about putting some shelves down the left side of the coat closet. He liked the idea and said it would be a simple project. If I came up with an idea of what I wanted, he'd help make it happen. SWEET! Music to my inner-designer-ears. Off I went to start sketching and drafting plans. Where is that tape measure again? I know we had last...summer?! Yes, it's been about that long since we've done any projects around the house but that's another post. Or maybe even a series of posts.

Looking all over, I could not find the tape measure anywhere. I started to get frustrated and was ready to blame a kid when I spotted it. Sitting right behind my computer. Doot-da-doo...no one saw that right?

Armed with my tape measure, I set to work conquering the coat closet. It was determined that 12-inch by 24-inch shelves would fit in the narrow space. Spacing them roughly 12-inches apart, looked like we could fit 5 shelves in there nicely.

Fast forward to the next day and off Hubbs, Biggs, and I went to Lowe's. Lil' Miss was at Amma's house waiting for the 90-degree weather to hit so she could go swimming in the "big" pool with her cousin.

We were at Lowe's, standing in the wood aisle. What have I gotten myself into?! So many choices. Too many choices. It's like trying to buy toothpaste or shampoo. I just want something to clean my teeth, hair, in this case, build shelves with. Why so many choices?!

We settled on white laminated pressed particle board stuff. I am sure it has an official name but I didn't actually introduce myself to it. I just wanted to purchase it to bring home with me. What's wrong with that? Next, we were off to find a rod to use for hanging the coats. The existing shelf in the closet was white wire. That sucker was outta there with this project! Looking at the mass of materials that was continuing to grow on our flatbed cart while standing on the "closet" aisle, we stumbled across a major assortment of wire shelving options. More choices!?

In the end, we decided to go with more wire shelving. This decision was 2-fold. One, it is what is in every closet in our entire house. Wood shelves would not match, which would drive me crazy...because I would know even if no one else did! Naturally, I would want to change out the shelves in every. single. closet. Two, the wire shelving was far less expensive and time consuming of a project. So, we exchanged one set of materials for the other and were off.

Once home, we emptied the closet and set to work. Of course, that's when I realized that I didn't actually take any before pictures. I'll describe the scene as best I can. Using your powers of inferring and mental imagery I think you'll get the gist.


The entire 52-inch existing shelf was covered with board games, a poker chip set, a clarinet, 4 dining room chair seat cushions, an old icky pillow, an even older queen size bed comforter, assorted craft items, assorted small child items, random ski hats, a Marine Corps flag (Semper Fi!), and other things I've suppressed from my memory. The hanging portion was jam packed with military uniforms (Go Air Force--did I mention that Hubbs is former Marine and Air Force? = a lot of uniforms), my wedding dress (which you see peeking out), a dress I wore as a bridesmaid in a cousins wedding, coats, coats, coats and more coats. I'm talking LOTS of coats. The floor in the left was packed with 2 tomato boxes of random art supplies I have not used in roughly 10 years. Good thing I was holding on to dried fake snow stuff. You need that stuff all the time! There was the box from the TV wall mount, the stand pieces should we ever choose to take the massive thing off the wall, a can of Fix-a-Flat, random gloves, hats, umbrellas, Christmas boxes and more. In the middle is where Mr. Vacuum lives with all of his lovely attachments...on. the. floor. Hidden behind the uniforms and dresses on the right was our camera tripod. Oh that's where we put it! Of course we would hide it from ourselves!

We pulled every single thing out of the closet and started the project. Hubbs would man the saw. I would man the installation. He knows I like to do stuff myself but do want his help too. So, he helps find ways to make that happen. :)

Hubbs' job!

He cut the first shelf to my specifications and we tried it out. Boo! Stupid door jamb is in the way! We had to problem solve the situation. We concluded that cutting off two of the peg ends would allow the shelves to fit snuggly in the space.

The two peg ends were removed from the left side. 
Once that was done, it looked like this.


Only, there was a problem...the left side was unstable because we couldn't use the wall bracket on that side like we had originally planned. Back to Lowe's I went.


These support braces were the solution. Now the shelves were very sturdy and we were getting a rhythm down. It started going pretty quickly.


I would measure, draw level lines (don't you love our little level guy? He's a little special...his mouth is above his eyes, but we love him just the same. Plus, he's magnetic, which means I could have him upside down and he was just as useful. He doesn't like it that way as much though. He always frowns), drill holes, mount hardware and place the shelf.

Before we knew it, the project was done. We had 4 new shelves. I decided not to put a 5th one because it would have been too high and not very useful after all. In all my excitement, I didn't take pictures of just the shelves. I HAD to get all of the stuff organized on them. Here's what the end product ended up like.

Floor basket has hats, gloves, umbrellas, MC flag

The other shelves house the paper crafting supplies I have...which is an insane amount. There's more than what you see here.
I went through everything and decided what to keep, what to donate and what to trash. The entire back of my car was filled with stuff for Goodwill....and it all came out of this little space!

Mr. Vacuum :) 

You can actually fit coats in here without getting a major workout now. 

Even the baby doll from my very early childhood has a nice little spot to hang out. :)
We still have an entire 8-foot long piece of wire shelf. Hubbs asked me if I wanted to use it in our bedroom closet. Um, YES! He may have created a monster. ;)

Friday, November 23, 2012

Hi Again!

It's been some time since I've written a post and for that I apologize. Let's just say, real life set in in August but now it is in well worn tracks so it should be a smooth ride from here on. 

Back in August, "Biggs" joined her high school swim team. GO T-WOLVES! She loved, loved, loved swim team and didn't complain a single bit about the 5:30 a.m. practices. Yup, five-thirty-a-m....five days per week for ten weeks. We worked out a carpool plan with two other families. It worked out perfectly! I took all 3 girls to the pool at 5:00 a.m. then went to the gym before work. Another family picked them up at 6:30 a.m. and drove them to school. The third family pitched in gas money. Win-win-win if you ask me. 

With swim practice, out-of-town and home meets, 

First swim meet, EVER!

Marching band and football games, 

Riding lessons for Lil' Miss, 


Getting the year started at work, 

You're looking at the middle of an incredibly productive planning session with my teammates!

I just hadn't taken time to do anything creative and fun. Not a single thing just for me.

That is until,
Hubbs reminded me how much I love being creative and perhaps that was what I was missing. He is such a wise man!

Rosie the Riveter and a Steel Worker for Halloween fun!
As soon as he said it, I knew exactly what I wanted to do first. Redo the main bathroom in our house. The project is almost complete. I'll post about it soon. I can't wait to share it! 

In the spirit of of Thanksgiving, I am so very thankful to be married to an amazing man who knows me better than I know myself...at times. :)

Tuesday, August 7, 2012

Teacher Space Redo

I wasn't planning to work in my classroom today but there is just something alluring about setting up a classroom for a new group of kids that this teacher can't resist. The fact that the hallway bulletin board was missing border because I ran out yesterday didn't factor into my visit today...no, not at all. I suppose my trip to IKEA to pick up stools and a small nightstand didn't factor in either. ;) 

After putting up the last pieces of border, I walked around my classroom surveying what needed to still be done and there it was...my teacher space. It was the elephant in the room yesterday and I was hoping it would become invisible before I returned but no. There is was rearing it's ugly head. Okay, ugly may be a strong word. The space was fine. It was functional but it was lacking to me. I didn't want to spend another year with my back to the room while I work on the computer. Plus, there is an amazing view out the window and I'd love to be near it. During the grey, rainy winter months, it will be important. 

My teacher space yesterday...


Nothing wrong with the space but it could be better. In the words of Lowes, "never stop improving." I totally get their slogan! 

After a bunch of pushing, pulling, unplugging, plugging back in, sweat and non-stop chime playing by Lil' Miss, here's what my teacher space looks like now. 


The kids always love lounging on these boxes to read and work. Oh look, the green lantern is up again!

Our classroom constitution hung on the blue paper last year. This year, it might house the calendar...

My desk is now by the window and no more sitting with my back to the room!

This arrangement allowed me to move a table closer to the whiteboard.

This area isn't quite right yet...so keep your eraser handy.

This area houses my teaching supplies. The baskets are labeled with the days of the week. I put the supplies I need for each day in them. Teaching resources are on the bottom shelves along with my collection of various size labels, close at hand, in the green bin.

This is the configuration I'm going to stick with this year unless I absolutely have to change it. I used to change arrangement every so often during the school year but it was like "Look what Mrs. Crone did" day when the kids came in and there were big changes. So, I really think about and intentionally plan arrangement before the kids show up. 


Until next time...imagining the possibilities.

Bonus picture...
I got 4 stools for this table since it is on the smaller size for the chairs I have. Plus, these are way cuter!

Monday, August 6, 2012

Welcome Back!

So here we are....August already! Back to school is just around the corner. In many parts of the country, school starts as soon as next week. (Insert happy dance that isn't the case here!) At the end of each school year, I bring home my summer projects for the next school year. I work on them until around the end of June then there they sit until August. Guess it's time to dig those out.

Since August is upon us, I thought I'd chronicle my journey of classroom set up and back to school. Sharpen those pencils, tighten those backpack straps and bring your erasers because there will definitely be some mistakes. 

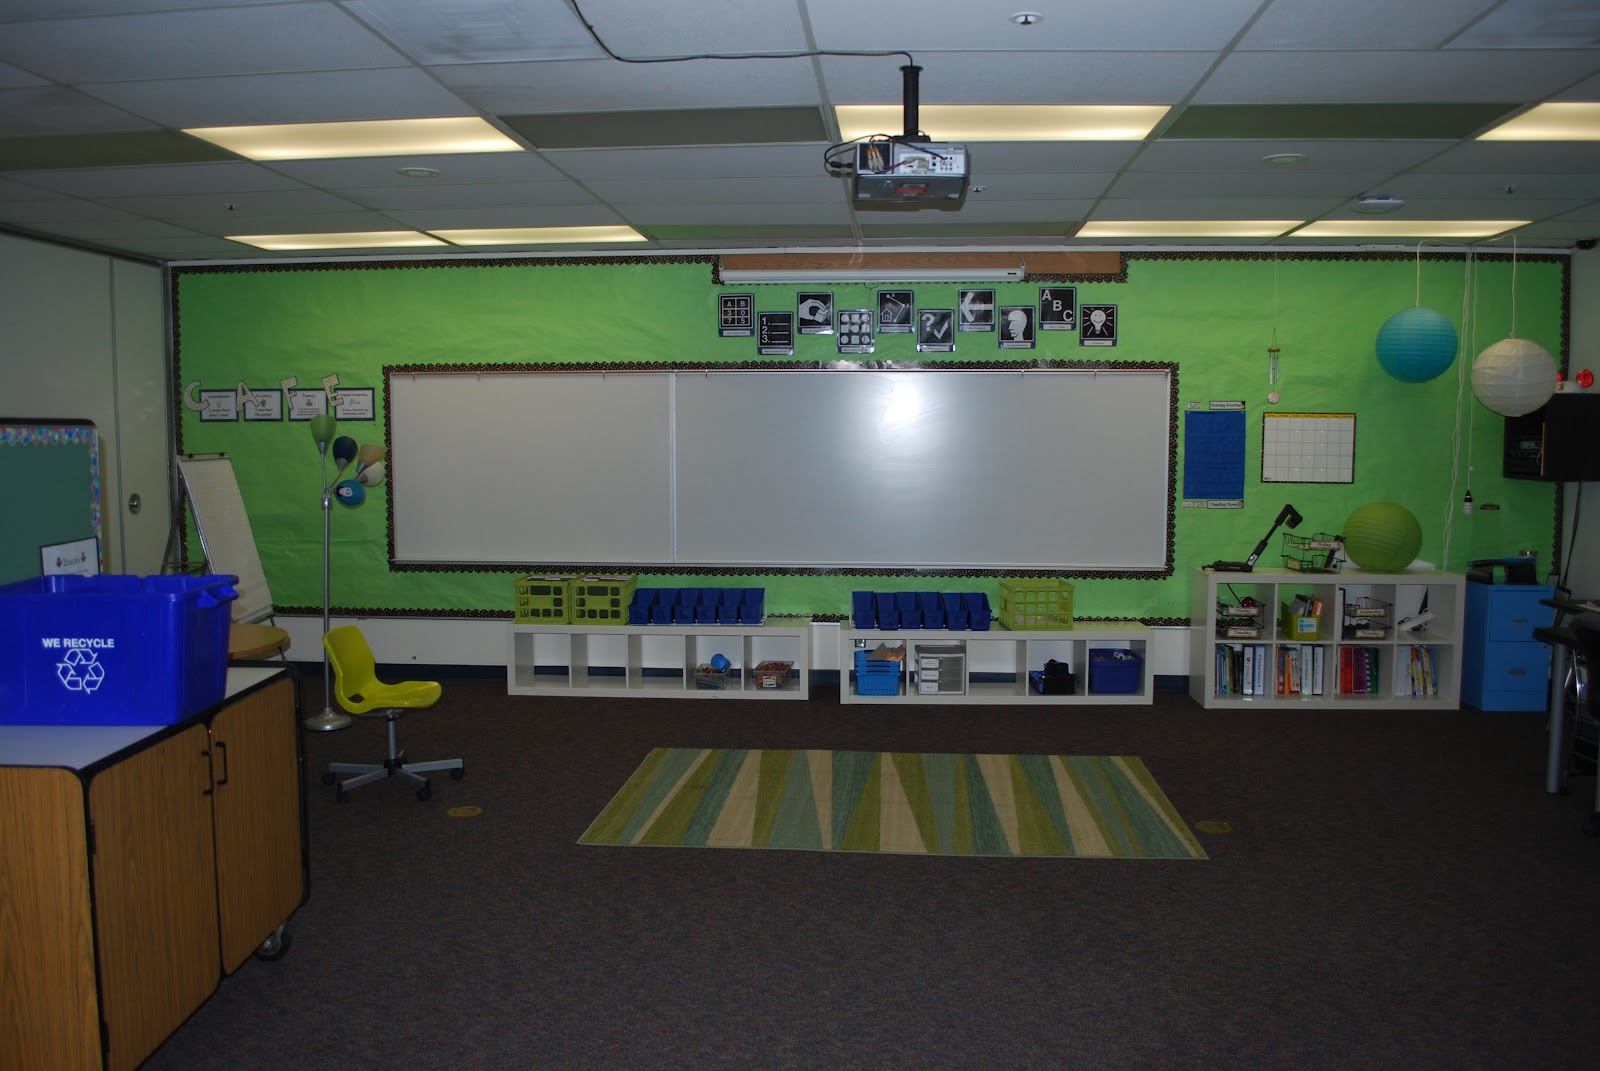
I imagine that students and perhaps even their parents think that a classroom fairy has been taking care of our lovely learning space all summer. That is the furthest thing from the truth let me tell you. Each August, I walk through the halls toward my classroom praying that it's "not so bad" this year. What ever do I mean? Over the summer, all rooms get deep cleaned and everything, I mean EVERYTHING is piled in the center or to the side of the room. This year, I can honestly say it is a "not so bad" year indeed! Take a look: 

Not so bad at all!

Don't be fooled...there are things hiding behind that ENORMOUS rolling cart.

Looks pretty good, right?

Although, I'm seriously wondering why/how the green paper lantern is down and the lighting assembly is dangling near the wall. Oh, and none of the items are on the right shelves...why did that happen?

Not so bad...

Whew! The class library is in place still. That white cabinet is HEAVY!!

Do you see the dark purple walls in the hall? That's our classroom display space. Gotta do something better with that this year.

Whoops! I forgot to give the kids their pictures at the end of school last year. Yikes! Won't make that mistake again.
 Okay, so all in all, not too bad at all. The past few years, I've been minimizing the items in my classroom like crazy! Right now, I'm trying to figure out what to do with the chairs I don't plan to use. I'll have to figure out a hiding place for them. 

My goal today was to play with placement. Last year, I had a row of 6 computers on the full length wall (hiding behind the enormous rolling cart) that is useable space this year. I want to have 2 carpet areas for lessons. One, around the easel and the other in front of the white board and document camera. Why you ask? Movement my friend. You can reset a child's attention span by simply having them turn or move to a different spot. Genius isn't it? I'm so grateful someone shared this tip with me! 

Okay, do you have that eraser handy? What you're about to see is trial furniture placement. I took pictures so I could look back and think about functionality and design; two difficult things to combine at times. Erasers out and GO! 


Created bench seating by putting a shelving unit from IKEA on it's side. The rocking chair was a Goodwill find a few years ago. Solid wood, $20!

Teacher read aloud books and fidget box storage.

Character building implements.

This will hold lunch cards for a quick grab on the way out the door.

It's hard to tell but the hallway walls are no longer purple...more on that later.

This is probably one of my favorite spaces so far. My girls donated their little adjustable rocking seats. The students will love them!

Carpet area 1...the CAFE board will be moved and I'll repaper the wall under it.

My other favorite area! Each students' picture will hang on the wall in this entryway. I'm going to make a saying in vinyl to go over the picture frames. I'm still working on the wording.

This is the front of the room. I haven't done anything here other than move the white shelves to the left a little.

This table will have it's adjustable legs pieces removed and be a kneeling work space. The black storage container will house pencils, colored pencils, glue sticks, scissors, erasers and a handheld pencil sharpener. Each table will have one.
So far, that's what has been done. Next time I go in, I'll work on the "teacher space." I like to use as little of the room as possible for me and have students using every possible inch they can. After all, it's our room, not just mine. 

Until next time...keep imagining the possibilities!

Sunday, July 29, 2012

Scrabble!

How many times have you played Words With Friends and gotten the message "______ may be misspelled" when you tried to sneak in a proper noun? Drives me CRAZY! Just let me play the bazillion point word I have all the letters for in the TW spot! You know you've said that too. ;) With this project, I'm taking the power back and using proper nouns in Scrabble! 

You may have noticed that I love letters, letter forms, text and fonts. So naturally, a name art project has been on my list. I got the idea forever and a day ago it seems. I even had all the supplies on hand. All that was missing was remembering to put it all together when I had time. While waiting for parts of another project to dry, I stumbled across the shadowbox frame and knew I could pump it out quickly. After all, the glue gun was already hot. 

I quickly gathered all the supplies; Scrabble tiles, shadowbox frame, 12 X 12 scrapbook paper, glue gun, T-square and corner square. Sitting at the kitchen counter, I got to work laying out the tiles so all of our names and the word family would fit on the 12 X 12 space. Take a look...


Now comes the fun part, gluing all the tiles! You might be wondering how I kept the placement and spacing. That's where the T and Corner square tools come in. Since Jeanette is the longest name and fit best in the middle, I knew the center of the paper would be in the space between the N and E. I lined up the T-square and corner square to find the center, put a little pencil dot (remember how nicely pencil shows up on black?) and used the T-square to help place the rest of the tiles in a straight line. 

Each tile is about .3 an inch away from the next.

Keeping the rest of the tiles laid out makes this project quick and easy.

The J and last E are about 2 inches from the edge of the paper.

I continued to move the T-square and glue tiles until they were all in place. 


It was really that easy. Not to mention QUICK! I love the end result! 


I think it's a shame that proper nouns can't be played in Scrabble. Jeanette is a 15 point word. With a TW spot, we're talking mucho point-os! The rules aren't going to change so using my craftiness, I have taken the power back. All I needed to do was a little thinking off the board. Now, that's how to use proper names with Scrabble!

Friday, July 27, 2012

Like a Kid in a...

cheese factory!

A few months ago, I thought about taking the girls to the Tillamook Cheese Factory in, where else, Tillamook, OR. It's about a 2 hour drive from our house and close to the beach, which makes it a great destination for a day trip. Naturally, when I first brought up the trip, we were in the last 6-8 weeks of school; one of the busiest times around here so the trip had to wait.


Yesterday, after living in the Portland/Vancouver area for just shy of 19 years, I finally made the trip to the Tillamook Cheese Factory. Of course, I took The Hubbs, Biggs, Lil' Miss and Cousin with me.

tillamook-cheese-factoryVoila! I was so excited I forgot to take a picture of the actual factory. This one is courtesy of 52 Perfect Days.com http://www.52perfectdays.com/articles/savoring-tillamooks-cheese-and-coastal-beauty/

It isn't an exaggeration that I was like a kid in a candy store. I LOVED watching the packaging team work their magic to make it so I can buy and consume the most incredible cheese on the face of the earth. As I watched the workers, my mind was racing. I was wondering all kinds of things like, how someone came up with the idea and automation of the factory machines, guessing the flavor cheese being cut and packaged, hoping they would start the machines on the left side of the room, and also thankful I'd spent some time reading up on cheese making on their website. There are signs everywhere telling the history and what is going on but how could I read the signs when there was CHEESE BEING MADE??!!

Lil' Miss asked if she could be the photographer. Being the supportive mother I am, I handed over the camera. She has taken amazing photos in the past and I knew she'd come through again. Here are some of her photos:
Playing with camera angle

Here come the "forties"...42lb. blocks of cheese. Lil' Miss said this might be enough cheese to hold her over for the day.

Slicing the forties into 2lb "Baby Loaf" size

Did I tell you how much Lil' Miss LOVES cheese yet? She definitely had her eye on what they were doing with her precious cheese.

Moving toward packaging

Lil' Miss and Cousin thought the machines with blue tubes should be called Octopus Machines.
I think Octopus Machine totally fits, don't you?

Extra cheese shaved off and put into white tubs....

I laughed at this picture when I first saw it. Lil' Miss must have been wondering what they were going to do with all the "extra" cheese. :D

The pictures have a cheddar quality to them don't you think? ;) We had to turn the flash off because it was reflecting off the observation windows. Cheddar-vision will have to do!

On the opposite side of the Factory are HUGE vats of milk used to make the "forties". We were able to see some of the production on both sides of the factory.

One vat holds 53,500 pounds of milk. There are 8 vats!

"Forties" getting vacuum sealed

The "forties" come out, sealed and ready for boxing.

Once in a box, it takes a ride up and out of the packaging rooms. I wonder where that conveyer belt leads...

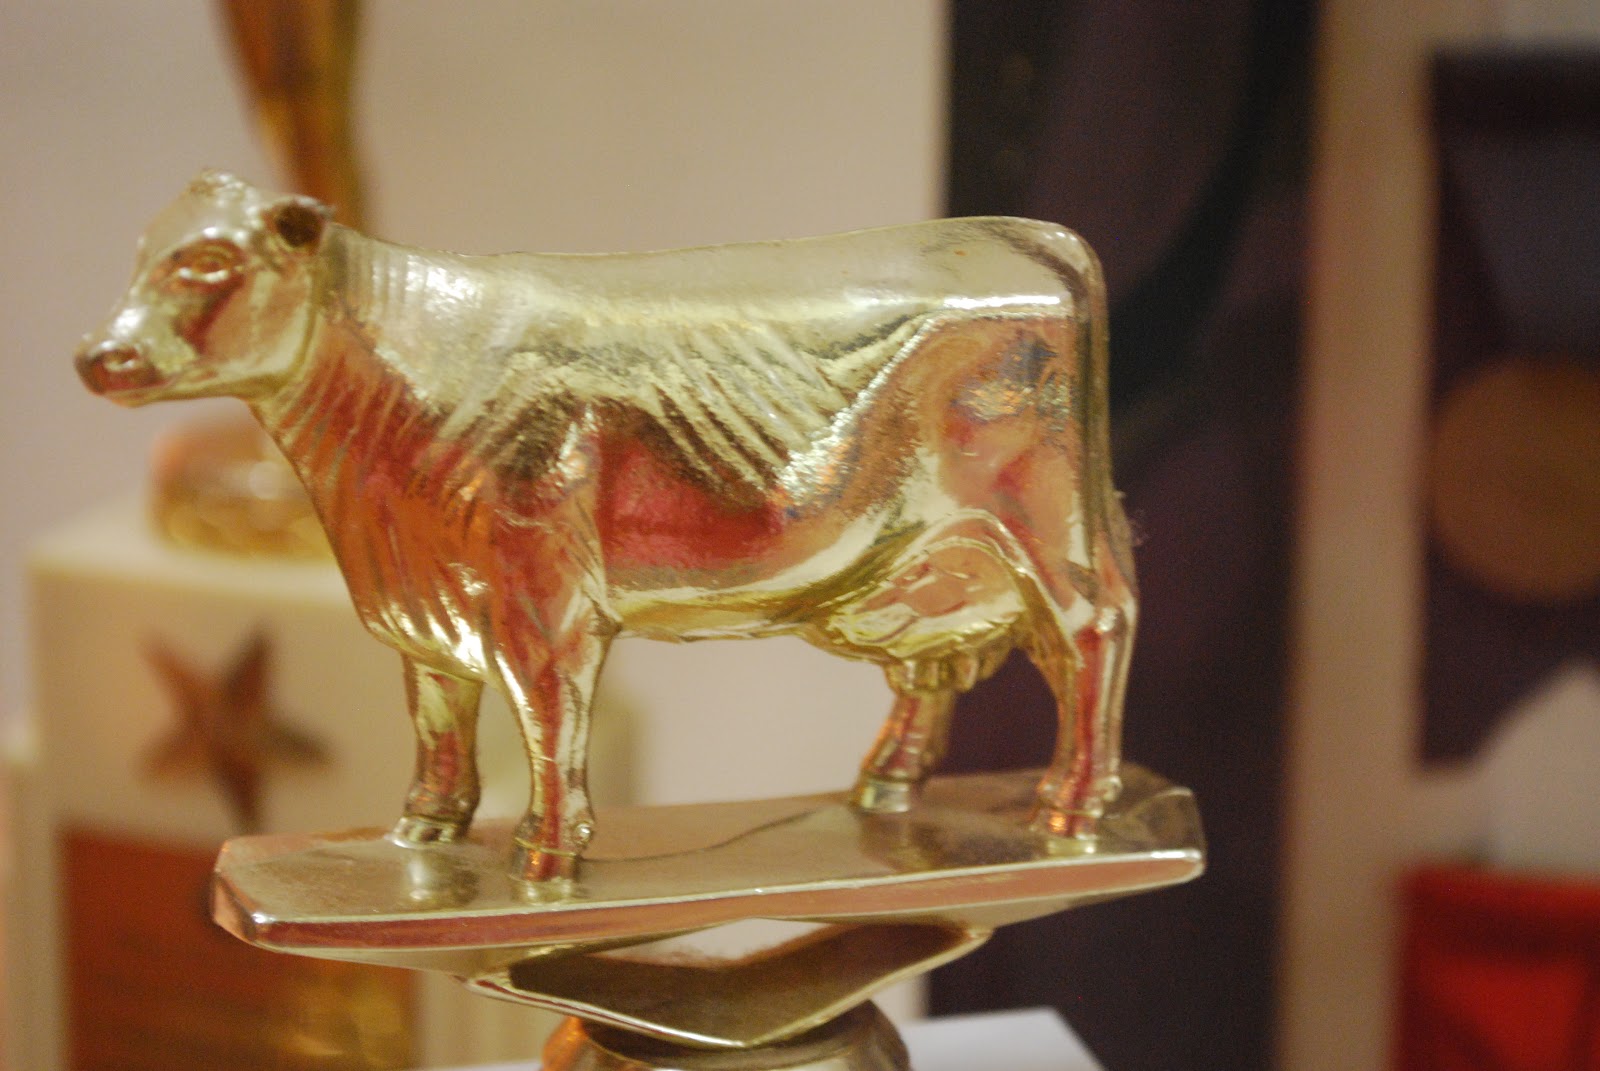
I noticed Lil' Miss taking picture after picture after picture of the trophies and medals in display boxes. After what seemed like 50 pictures, I told her that was probably enough pictures of bronze cows. She did get some great shots though.


Of course, my favorite shot of the day is this one of Biggs, Lil' Miss and Cousin...

It was a great visit to the cheese factory! I'm sure we'll be going again. After all, where else am I going to find a 2 pound block of Smoked Cheddar Cheese? Maybe I can smuggle out a "Forty." ;)