Pages

Showing posts with label classroom. Show all posts

Tuesday, August 7, 2012

Teacher Space Redo

I wasn't planning to work in my classroom today but there is just something alluring about setting up a classroom for a new group of kids that this teacher can't resist. The fact that the hallway bulletin board was missing border because I ran out yesterday didn't factor into my visit today...no, not at all. I suppose my trip to IKEA to pick up stools and a small nightstand didn't factor in either. ;) 

After putting up the last pieces of border, I walked around my classroom surveying what needed to still be done and there it was...my teacher space. It was the elephant in the room yesterday and I was hoping it would become invisible before I returned but no. There is was rearing it's ugly head. Okay, ugly may be a strong word. The space was fine. It was functional but it was lacking to me. I didn't want to spend another year with my back to the room while I work on the computer. Plus, there is an amazing view out the window and I'd love to be near it. During the grey, rainy winter months, it will be important. 

My teacher space yesterday...


Nothing wrong with the space but it could be better. In the words of Lowes, "never stop improving." I totally get their slogan! 

After a bunch of pushing, pulling, unplugging, plugging back in, sweat and non-stop chime playing by Lil' Miss, here's what my teacher space looks like now. 


The kids always love lounging on these boxes to read and work. Oh look, the green lantern is up again!

Our classroom constitution hung on the blue paper last year. This year, it might house the calendar...

My desk is now by the window and no more sitting with my back to the room!

This arrangement allowed me to move a table closer to the whiteboard.

This area isn't quite right yet...so keep your eraser handy.

This area houses my teaching supplies. The baskets are labeled with the days of the week. I put the supplies I need for each day in them. Teaching resources are on the bottom shelves along with my collection of various size labels, close at hand, in the green bin.

This is the configuration I'm going to stick with this year unless I absolutely have to change it. I used to change arrangement every so often during the school year but it was like "Look what Mrs. Crone did" day when the kids came in and there were big changes. So, I really think about and intentionally plan arrangement before the kids show up. 


Until next time...imagining the possibilities.

Bonus picture...
I got 4 stools for this table since it is on the smaller size for the chairs I have. Plus, these are way cuter!

Monday, August 6, 2012

Welcome Back!

So here we are....August already! Back to school is just around the corner. In many parts of the country, school starts as soon as next week. (Insert happy dance that isn't the case here!) At the end of each school year, I bring home my summer projects for the next school year. I work on them until around the end of June then there they sit until August. Guess it's time to dig those out.

Since August is upon us, I thought I'd chronicle my journey of classroom set up and back to school. Sharpen those pencils, tighten those backpack straps and bring your erasers because there will definitely be some mistakes. 

I imagine that students and perhaps even their parents think that a classroom fairy has been taking care of our lovely learning space all summer. That is the furthest thing from the truth let me tell you. Each August, I walk through the halls toward my classroom praying that it's "not so bad" this year. What ever do I mean? Over the summer, all rooms get deep cleaned and everything, I mean EVERYTHING is piled in the center or to the side of the room. This year, I can honestly say it is a "not so bad" year indeed! Take a look: 

Not so bad at all!

Don't be fooled...there are things hiding behind that ENORMOUS rolling cart.

Looks pretty good, right?

Although, I'm seriously wondering why/how the green paper lantern is down and the lighting assembly is dangling near the wall. Oh, and none of the items are on the right shelves...why did that happen?

Not so bad...

Whew! The class library is in place still. That white cabinet is HEAVY!!

Do you see the dark purple walls in the hall? That's our classroom display space. Gotta do something better with that this year.

Whoops! I forgot to give the kids their pictures at the end of school last year. Yikes! Won't make that mistake again.
 Okay, so all in all, not too bad at all. The past few years, I've been minimizing the items in my classroom like crazy! Right now, I'm trying to figure out what to do with the chairs I don't plan to use. I'll have to figure out a hiding place for them. 

My goal today was to play with placement. Last year, I had a row of 6 computers on the full length wall (hiding behind the enormous rolling cart) that is useable space this year. I want to have 2 carpet areas for lessons. One, around the easel and the other in front of the white board and document camera. Why you ask? Movement my friend. You can reset a child's attention span by simply having them turn or move to a different spot. Genius isn't it? I'm so grateful someone shared this tip with me! 

Okay, do you have that eraser handy? What you're about to see is trial furniture placement. I took pictures so I could look back and think about functionality and design; two difficult things to combine at times. Erasers out and GO! 


Created bench seating by putting a shelving unit from IKEA on it's side. The rocking chair was a Goodwill find a few years ago. Solid wood, $20!

Teacher read aloud books and fidget box storage.

Character building implements.

This will hold lunch cards for a quick grab on the way out the door.

It's hard to tell but the hallway walls are no longer purple...more on that later.

This is probably one of my favorite spaces so far. My girls donated their little adjustable rocking seats. The students will love them!

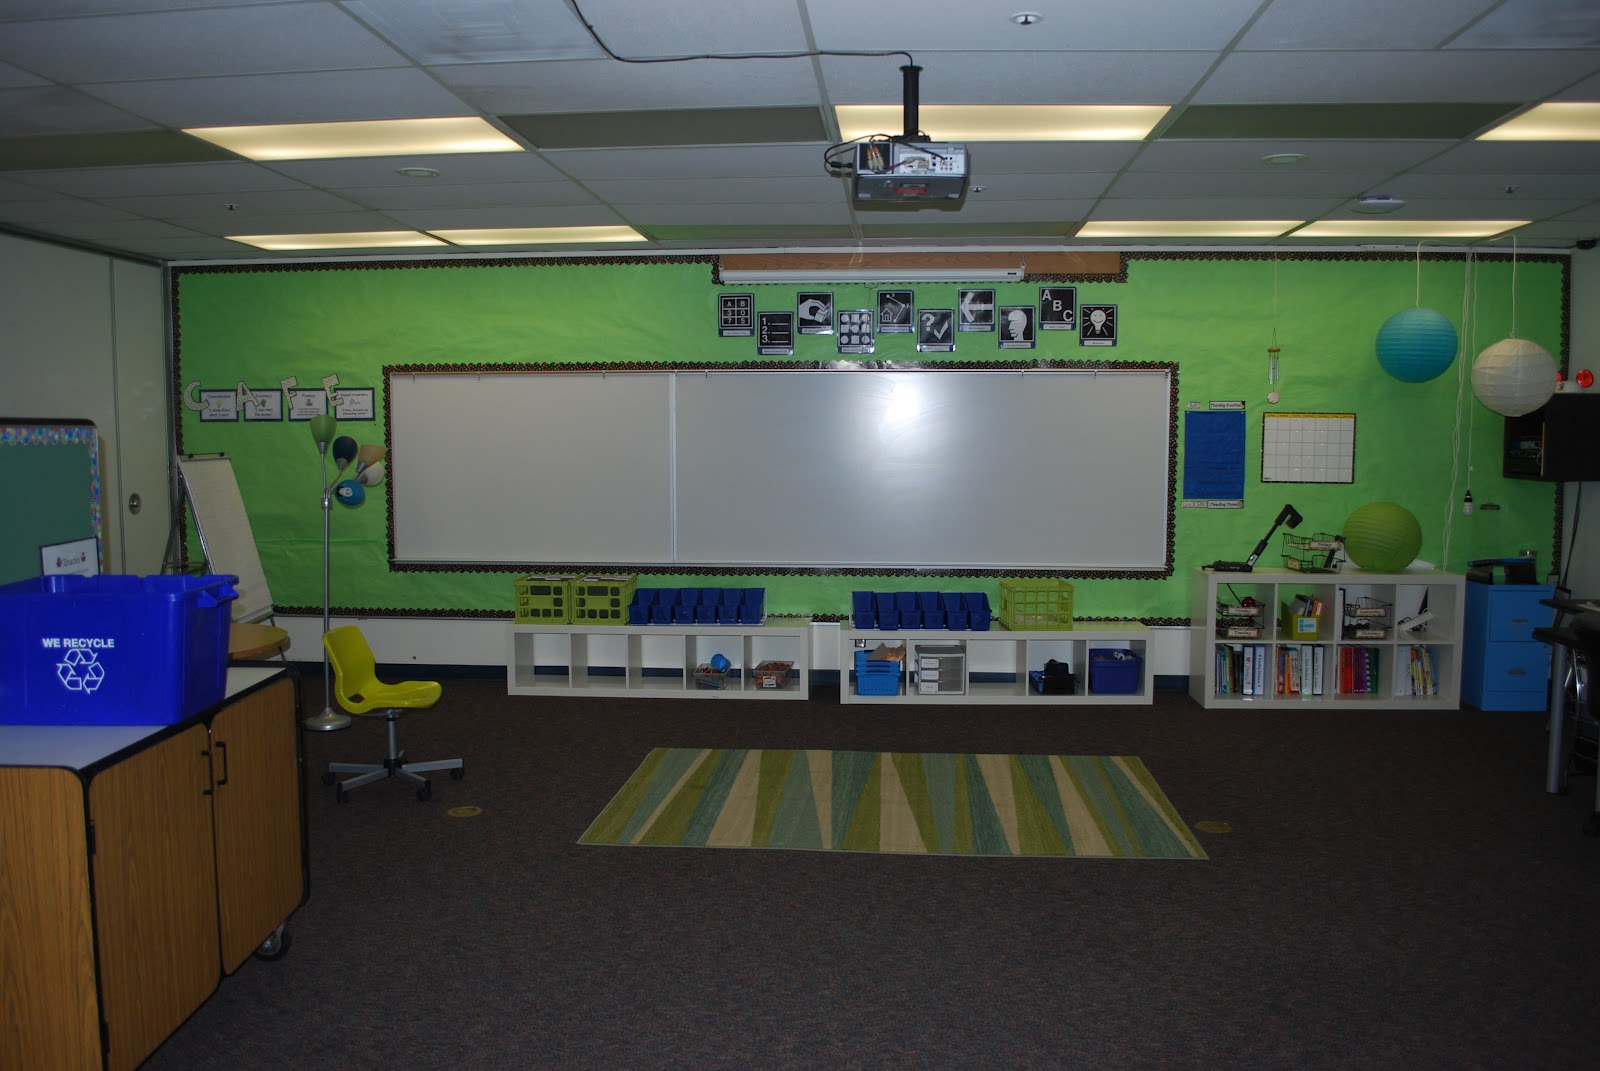
Carpet area 1...the CAFE board will be moved and I'll repaper the wall under it.

My other favorite area! Each students' picture will hang on the wall in this entryway. I'm going to make a saying in vinyl to go over the picture frames. I'm still working on the wording.

This is the front of the room. I haven't done anything here other than move the white shelves to the left a little.

This table will have it's adjustable legs pieces removed and be a kneeling work space. The black storage container will house pencils, colored pencils, glue sticks, scissors, erasers and a handheld pencil sharpener. Each table will have one.
So far, that's what has been done. Next time I go in, I'll work on the "teacher space." I like to use as little of the room as possible for me and have students using every possible inch they can. After all, it's our room, not just mine. 

Until next time...keep imagining the possibilities!

Friday, January 20, 2012

Birthday Board

Update...Sadly, on February 3, 2013, my school was lost in a 3-alarm fire. Everything burned to the ground. I loved this birthday board, but have yet to remake it. Maybe this coming school year I will be able to recreate this. It was one of my favorite creations for my classroom.

Having time off work for Christmas gave me an opportunity to spend some much needed time perusing as many blogs as I could and Pintrest. Yeah, I know...I can't tear myself away from it either. My goal was to find an inspiration and boy did I! A Birthday Board that I just couldn't take my eyes off. Inspiration Birthday Board

Since it was Christmas time, I set out to create a Birthday Board of my own for as close to zero cost as possible. Where else to start than a dig through my supplies and garage. I hit the jackpot! A few years ago, when my girls went to a summer program, they each made a painted board. These boards have been in the garage for quite some time and I knew they wouldn't mind me repurposing one after they had already broken the boards into smaller pieces. The perfect scrap was 22 inches long by 4 inches wide. Perfect! Next, time to go through the cans of spray paint...I am loving spray paint lately have I mentioned that yet? I wanted the wood piece to be black and just so happened to have some black paint left over and found the can of primer as well. I was ready!

First, I sanded down the edges of the wood, primed and painted the wood black. It took a day or two for this process since I was spray painting in the wet, humid, winter temps and weather. While it was drying, I was able to start planning my next steps.

Normally, I don't care for primary color combinations. They feel to "primary" school to me. Just not my style. But, I was digging it for the project. Oh, yeah, this Birthday Board is for my classroom, which is a blue and green color palette. The fact that I did want to use primary colors this time surprised me a bit but just like all good design, too much of a good thing can be bad. There is already a lot of blue and green in my classroom and I don't want the color palette to start feeling "flat" so this pop of primary and black will fit beautifully.

A trip through my cardstock and I had 5 colors ready to cut into circles; red, blue, green, yellow, orange and purple. Using the Plantin Schoolbook cartridge, I cut umpteen million, okay probably more like 100, 1.5 inch circles. These would be the pieces hanging below the board with a student name and date on it. Using the Cuttin' Up cartridge, I made 1 inch, lowecase letters for the month circles on the bottom of the board. I made 2 inch letters for "Birthdays" in the same font.
I love the fonts on the Cuttin' Up cartridge.
Once the paint was dry, it was time to start planning out placement. I strive to be as exact as possible...my mom taught me that perfection is not attainable so strive for excellence. Over the years, I've added to that with learning that the beauty in so many things is actually the imperfections. So, from here on out, you'll see how I strive for excellence and yet allow for imperfection to enhance my projects.

Adjusting placement before gluing things down.
I'm a planner, plain and simple. An extra piece of posterboard lying around served as a great planning guide. I measured out the size of the board and began placing the letters and month circles on the board using the posterboard as my measuring guide. On the posterboard is a line marking the 4 inch width as well as a line down the center of the 22 inch length. Since "Birthdays" is 9 letters long, the "h" needed to be in the center of the board. Then, I adjusted the placement of the other letters to the left and right until I had it just the way I wanted it. The month circles were placed the same way...from June and July on either side of the center line to January and December on either end. Once I was happy with their placement, I glued them in place.

While I was waiting for the glue to dry, I used a white gel pen to write names and the day of birth on the hanging circles. It turned out that it was too hard to see the white gel pen on the yellow circles so that color was eliminated from the hanging circles. I intentionally placed colors so there were not any same colors next to each other.
Playing with placement...and keeping the numbers in order from beginning of the month to the end.
Attaching the hanging circles to the board was my next challenge. I went with white ribbon. It is inexpensive and would be easy to get year after year so I can continue to use and update the board. Of course I planned this out too, lol! Using a month with only one birthday, I decided how far I wanted it to hang under the board. Then, I marked that length on the posterboard planning guide to ensure all the hanging circles would be about the same distance under the board....imperfection at its finest!
Sorry it's sideways....do you see the small - indicating where the top of the circle should be?
Each month was done this way. Months with more than one circle were done as follows. Place the last circle for the month at the end of the ribbon with hot glue. Then, place the next one on the ribbon, adjusting for distance and finally gluing down with hot glue.
Strings hanging circles
Once the string was done, I used the measuring guide to cut the length of the ribbon at the top. On the back of the board, I measured and marked where I wanted the top of the ribbon to be. Be careful here...you'll need to make sure you're lining up with the month letters on the front of the board. My strategy was to hold the board up looking at the front, put the ribbon piece behind and mark the top of the ribbon with the white gel pen on the back so I knew exactly where to line up the ribbon when gluing it down.

Okay, so I didn't totally wait for the paint to dry...that's primer you see but it's on the back, no one will see in the end.

Marks used to line up the ribbon for the correct length.
I kept doing this until all the circles were in place. I used 3M Picture Hanging strips to adhere it to my classroom wall.  I put it right by my desk too so I can easily see whose birthday is coming up. :)

Voila!! I love how it turned out!