Pages

Saturday, July 21, 2012

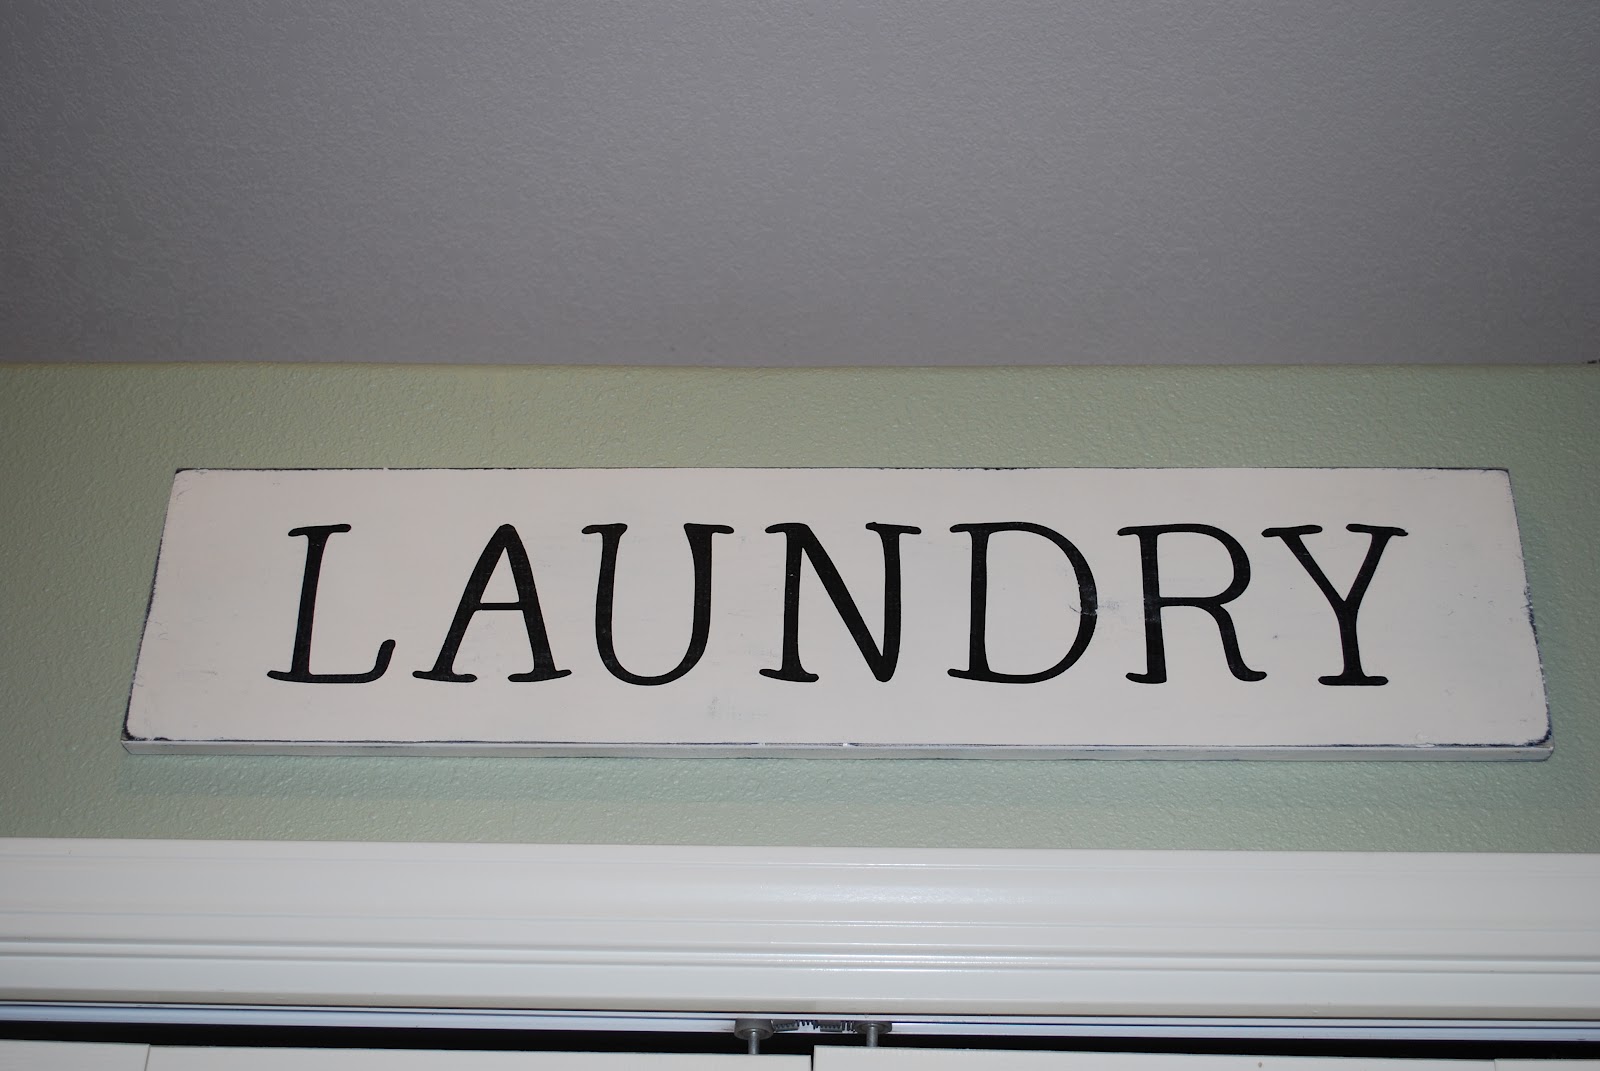
"LAUNDRY" Board = First Project Using Vinyl

After thinking about it for about a year, I've finally taken the plunge...my first time cutting and using vinyl on a project and it turned out GREAT! It is a new found favorite for sure. So, what did I make? A subway art LAUNDRY sign to hang above the laundry closet in my kitchen. Yeah, you read that part right too. Our laundry is located in our kitchen. Nice, huh? Full window in the master bathroom and a bi-fold door laundry closet in the kitchen. Great design Builder! I shouldn't complain. My house is quaint and I adore it even if it isn't always the best design layout or plan. Luckily, the bonus is that I can change things to my liking one step at a time.

For this project, I used the leftover piece of 1 X 8 pine board from the Mason Jar Bar and Towel Rack projects for the master bathroom. (No, I haven't posted the Towel Rack project yet...it's coming.) Here's the rundown of supplies:
  • 32"L -- 1 X 8 pine board leftover from other projects
  • Rustoleum Black spray paint 
  • Black and Decker Mouse Sander
  • Lint free cloth
  • Rustoleum Heirloom White spray paint
  • Sprayer handle for spray paint (optional)
  • Black vinyl 
  • Cricut and accessories for cuts
  • Deep cut blade 
  • Sure Cuts A Lot Software
  • Computer
  • Masking Tape
  • Pencil
  • Level/meter stick
  • Sawtooth Hangers (2)
I started out by spray painting the board black and letting it dry. Once it was dry, I noticed it was a bit rougher than I wanted so I use my Black and Decker Mouse Sander to smooth the surface. Lil' Miss was fascinated with what I was doing and wanted to help out. She got to help wipe down the board after I gave it a light sanding.

Lil' Miss' feet!

One of the best purchases for a Crafter like me.

Wax on, wax off...no more like...dust off!

Crafty Neighbor (CN) was my saving grace for this one. I am in love with the font "Whackadoo" but do not have the capability to cut it. Well, CN has the amazing Sure Cuts A Lot software and was able to hook me up. So excited! I chose "Whackadoo" because it's playful but not too "cutesy." With my supplies in tow, I set off across the street to take on the daunting vinyl.

Test cut

CN set up the letters using the software, helped me cut the vinyl to fit on the cutting mat and off we went. We decided to make a test cut so we could check that we had the settings right on the Cricut before we tried cutting the entire word. Here are the settings we used: Speed-Medium (3), Pressure-Medium (3), Deep cut blade set to blade depth 3. I loaded the mat, pressed cut, watched and waited. Oh, before I forget, the letters are 4.3 inches tall.

Cutting, cutting, cutting.

Look at that! It's perfect! I peeled away the negative space vinyl leaving only the letters on the backing.

The next part was pretty fun. I used regular ole masking tape, which I bought for $4 vs. $10 for the ProvoCraft Transfer Tape. The masking tape worked great! To transfer each letter, I put a few strips of masking tape on top of the letter I wanted to move.


Then, I burnished the tape with a small, plastic scraper. The tape then "picked up" the letter when I pulled the tape off the backing at a 45 degree angle. Picking it up at an angle allows you to lay it back down and burnish again if part of the letter sticks to the vinyl backing paper. I decided to lift all the letters on the transfer tape then line them up on the painted board and apply them one at a time.

Burnishing the transfer tape.

Lifting the transfer tape at a 45 degree angle.

To help place each of the letters, I drew guidelines on the painted board. Pencil shows up great on black. The silver line is easy to see and I didn't need to worry about erasing it since I'd be applying another layer of paint.

Do you see the pencil line?

There is a line across the top and bottom.

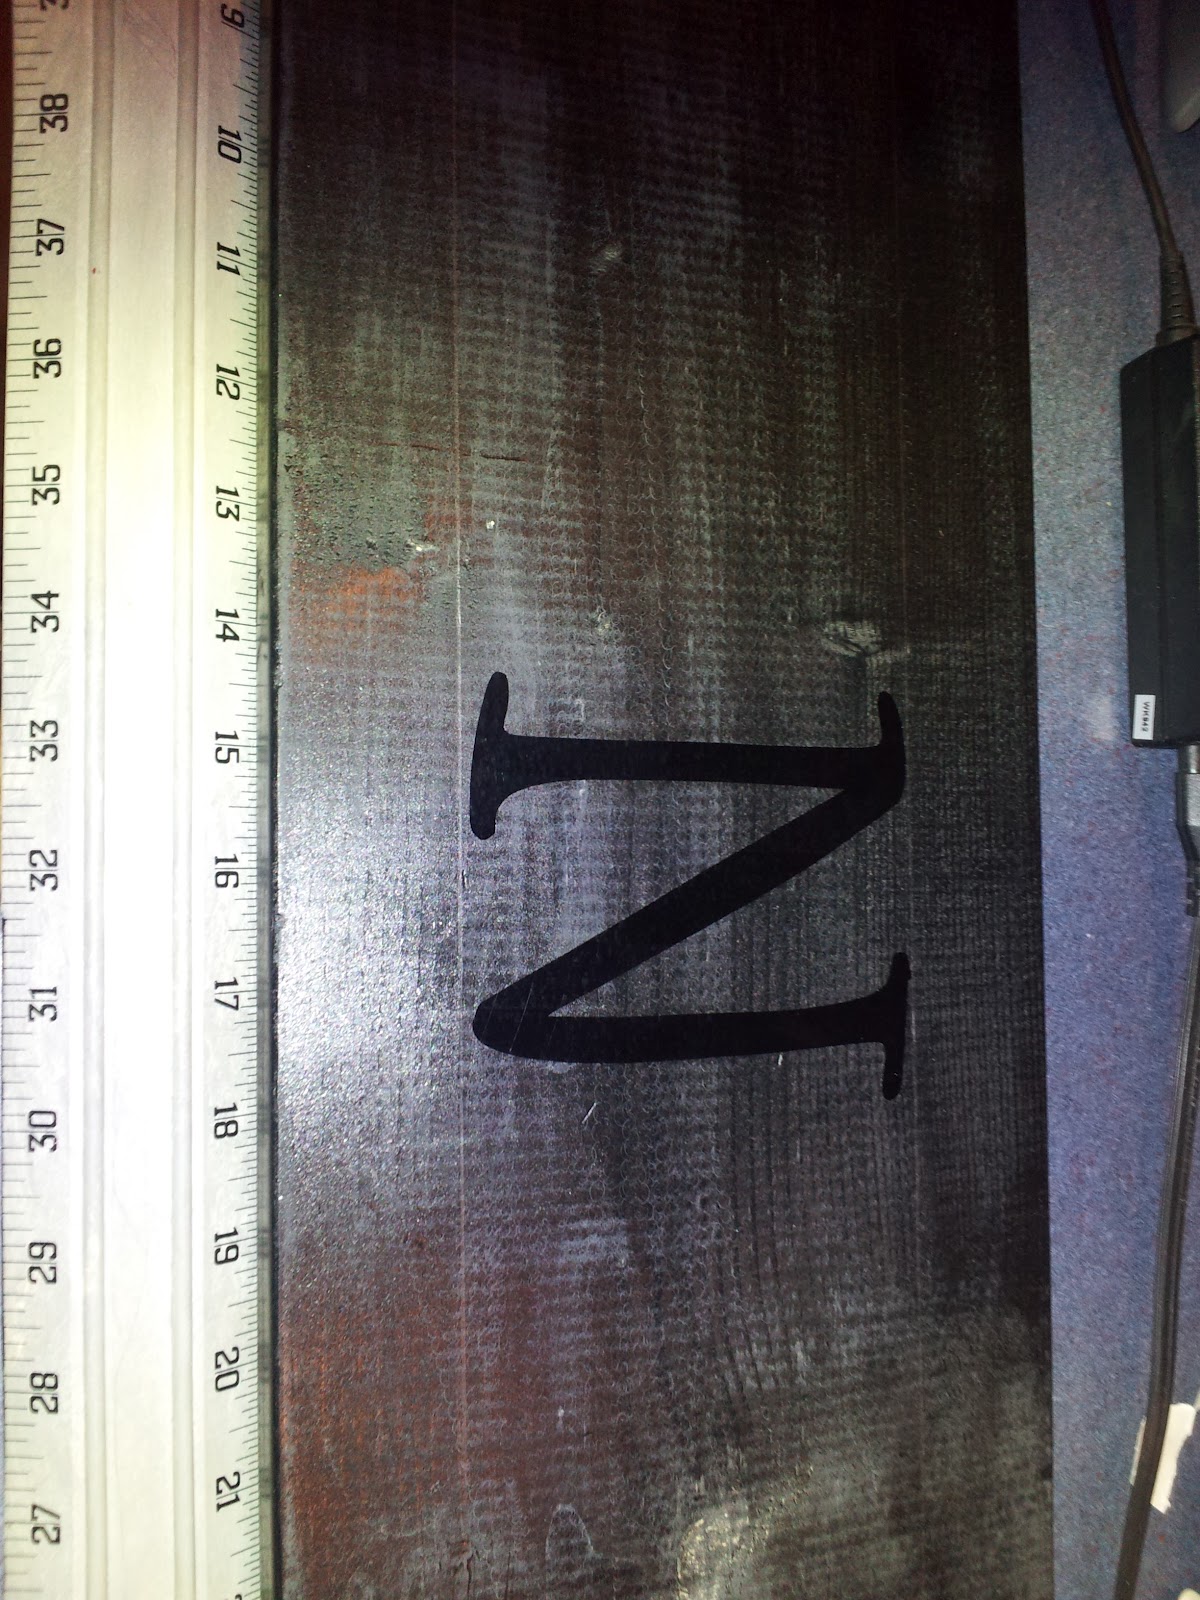
I started with the "N". Why? It's the middle letter in the word LAUNDRY so it needed to be in the center of the board. Now, I had my handy-dandy meter stick with levels but honestly, I'm usually more successful "eyeballing it."
Eyeballed placement
 The "N" was placed at 16" with the center of the letter hovering around the 16" mark. I had laid all of the letters wrong side up as I adjusted spacing then turned each one over one at a time to apply it to the board. Once I had the spot just right, I turned the "N" over, laid it on the board, between the guidelines and burnished it again. Slowly, at a 45 degree angle, I pulled up the masking tape. Talk about an exhilarating feeling to remove sticky tape and have an amazing letter lay in it's place! That fact that I was going to do it 6 more times...icing on the cake! Uniformity + repetition = happy once again ;)


Burnishing the first letter on the board.

Removing the transfer tape...

Woowoo!! It's just want I pictured!

Placing the letters was a lot of fun. CN said I got faster with each one.

After all the letters were burnished to the painted board, it was time for the next coat of paint. What color other than Heirloom White. I made the trek back home for this part. Lil' Miss and friend were again intrigued about what I was doing. They laughed when I sang, "Shake, shake, shake. Shake, shake, shake. Shake your groove thing" as I shook up the spray paint. Lil' Miss is never lacking questions. She wanted to know why the letters were black on black. Why was I going to paint over them? Wouldn't the paint cover the letters? What color would the letters be after I painted and lifted the vinyl off? I love her inquisitive mind! Now that the board is painted in the top coat, it's time to let it dry.

Top coat of Heirloom White is applied and ready to...

DRY! ;)

We went to a fabulous BBQ while the paint dried. Ribs, corn on the cob, berry spinach salad, au gratin potatoes and poached pears with chocolate sauce for dessert. Yum! As soon as I got home and checked the board, it was time to peel off the vinyl letters. Oh man! This was going to be exciting! Would the letters come off well? Would the paint stick to them and pull up like it sometimes does on walls? ...now you know where Lil' Miss gets her questioning gene don't you?... Starting with the letter "L"... here goes....


Looking good!

I feel a song coming on..."La, la, la, la, la...."

Success! Love, love, love this!


The last few steps are in sight! Distressing, seal coat, attach sawtooth hangers and put it up!


To distress the board, I used my Mouse sander again. I like to sand outside so I'm not breathing in as much of the dust not to mention that the lighting is phenomenal!  When distressing, I do a little at a time keeping in mind, I can take more off but I can't put it back on very easily. I wanted the black undercoat to show so I gently sanded the edges, ends and a bit on the surface. Remember those rough places I didn't really like when the board was black? Well, they are the perfect spot for extra sanding and distressing on the final product. Take a look...


After distressing, I sprayed a coat of matte finish sealant to protect the finish. Once that was dry, I attached sawtooth hangers on the back in the upper corners, 1 inch in from the sides and about half an inch below the top of the board. Using a level, I put a few nails in the wall, hung up the sign and WOW! It's better than I imagined!


So, what do you think?! I can't wait to make more...who wants one? ;)

Wednesday, July 18, 2012

Mason Jar Bar

During one of my Pinterest perusing sessions, I happened upon this Mason Jar Key Hook project on Shanty 2 Chic's blog. (I adore their projects and blog, btw!) Make something to hang on the wall that uses Mason jars? Sign me up!

Since I've been working on my master bathroom, what better place for this amazing project. I decided to make a smaller version with only one hook for a hand towel and two mason jars for toothbrushes? cotton balls? Q-tips? I didn't have to decide right then. I knew I'd find a great use for it. 

I set off to Lowe's late one Sunday night. That's the best time to shop there in my opinion. There were hardly any people and sales reps were readily available to help me. I picked out an amazing 1 X 8 and had it cut into a 16" piece, a 24" piece and took the rest as it was. Curtis, the very boisterous sales rep, cut the pine board for me and chatted all the way back to the check-out counter. He was very intrigued about what I was making and wanted to know all about it. Like any good DIY-er, I was happy to tell him all about it. :) On with the building show!

I picked up Matte Nickel Robe Hooks at Wal-Mart. They had a pack of 6 for $5 and some change. It was better than Lowe's or Target, which wanted just about $3 for 2. Since I will be using more for another project, I got the 6-pack.  I had to search high and low to find Rustoleum's Heirloom White spray paint. Fred Meyer carries it but of course, they were out of stock when I went. I ended up finding some at Home Depot a few days later. I also picked up Rustoleum Java Brown Glaze for $15 at Home Depot. The quart will last through many, many, many projects to come. Other items I needed were two 2" clamps that look like this.

For some reason I didn't take pictures during the process, which is so unlike me. I'll walk you through the steps and show the finished product.
  1. Use push-ins in the 4 corners on the backside of the board to hold it off the ground when painting. 
  2. Turn board over so it rests on the push pins and spray Heirloom White. 2 coats with plenty of drying time between coats. 
  3. After the second coat is completely dry, I sanded the surface a little bit as it was more rough than I wanted. 
  4. Then, I sanded the corners/edges using 220-grit sandpaper on my "mouse" handheld electric sander. You could also use 220-grit sandpaper on a 3M sanding block or in your hand. Your choice completely! I sanded until I could see the bare wood and rounded the corners/edges some. 
  5. Wipe down the entire board with a lint free cloth to remove all dust. 
  6. Using a small foam brush, brush on the Java Brown Glaze in the direction of the wood grain. Brush on a little glaze, wipe off the excess and repeat until you've reached your desired level of distressing. Take your time with this step. You can put more on but you can't easily take it off. However, if you rub in the direction of the grain right away, you'll get pretty close to removing all of it. 
  7. Let dry. 
  8. Once the glaze is dry, coat with a clear sealer. 
  9. While everything is drying, I worked on making holes in the clamps large enough for a wood screw to go through. The best method I found was, using a scrap piece of 2 X 4, a nail and hammer; hammer the nail through the slot in the clamp you want at the back. This took a little while but was worth it. 
  10. When everything is dry, attach the robe hook and clamps. 
  11. Attach sawtooth hangers on the back and hang.
  12. Put the Mason jars in the clamps, fill and...
  13. VOILA! It's done! 

 
Isn't it great!?
More finished product shots. Again, I'm so sorry I didn't take process pictures. Live and learn!

The distressing is very visible in this picture. I LOVE IT!

You can kind of see how the clamps are attached...kinda...ok, maybe not so much.

Cotton balls at first but now, this jar holds our toothpaste and toothbrushes.

I don't know why, but this one reminds me of my Grandma. She used to store cotton beauty supplies in glass jars. :)
So, that's it. I think I am most proud of this project and it's sister rack...but that's for another post. ;)

Tuesday, July 17, 2012

TP Rolls as Wall Art?!

We've all seen the pins on Pinterest for toilet paper roll wall art. Really? Can tp rolls look that nice? Yes, they can and the fact that it's a quick, fun project makes it an enjoyable venture. It may be a great place to start if you're just getting into crafts and DIY. 

Now, this one does take some planning. You have to start saving tp and/or paper towel rolls. It took me about 6 months to save for this project. There are some leftover but I'll use them for another project in the future. I suppose you could solicit everyone you know for their empty rolls. 
Knock, knock. 
"Oh, Hi Jen. How are you?"
"I'm well....can I have your empty tp rolls?"
<Insert strange look and silent thoughts of "What in the world?" here> 
Now that the worst is over, get to collecting those rolls! 

Here's what you'll need: (Sorry, I was so excited I didn't gather and photograph all the materials.) 
  • 30-35 tp rolls, cut to 1.5" sections
  • Pen
  • Scissors
  • t-square/ruler/meter stick
  •  Hot glue gun and glue
  • Spray paint (color of your choice)
  • Surface protector
  • Imagination
  • About 1 hour
I started by cleaning all the little pieces of paper still stuck to the rolls. It took hardly any time. The sticky stuff that holds the paper on the roll is actually really forgiving and releases with a gentle tug. Plop yourself in front of the TV and you'll be done in no time. :) 


Next, I used a corner square and small (12") t-square to use for measuring. This part was pretty fun for me. It fed right into my OCD tendencies to do things exactly the same over and over again. Here are the steps I took. 
  1. Flatten the tp roll. Put it on the floor and push down with your hands until it's flat. 
  2. Line it up with the corner square. Use the t-square with the ruler pointing away from you and the t lined up against the other side of the flattened roll. (Confusing enough?) Line up the ruler edge with the measurement you want, I used 1.5", on the corner square, draw a line and move to the next measurement spot. 
  3. Cut the roll on the lines. 
You'll end up with a pile like this: 

Once all the rolls you want are cut, it's time to play with design. I cleared off the kitchen table, plugged in the glue gun to heat up and began experimenting. Think about where you plan to put the art as you're designing. Mine is going above the kitchen cabinets in the peak. It's been a blank spot forever and I have been trying to decide what should go there. I thought this project would be perfect. Honestly, this took the longest as I couldn't decide what I liked most. Finally, I found it! 


The fun part was about to begin, gluing it together! Remember how I said earlier that I have an OCD tendency to do things exactly the same way over and over again? That might explain why this was SO INCREDIBLY SATISFYING for me! As I began, I figured out how I could be more efficient in gluing, timing and making the final product look polished. 

I started with the horizontal pieces in the center and glued them end to end. 
The bowl has no significance to this project. It helped hold the end of the posterboard flat.
I decided to do the bottom half first. Leaving the design on the kitchen table, I just grabbed and attached a row at a time. 
Run a line of glue along the end of the vertical piece then abut it to the seam between the horizontal pieces.
Keep the rest of the pieces in place. It helps ensure the final design looks like the original plan.
Now, my favorite part of the whole project. The steps I did to glue the pieces together. 
Pinch the two pieces together. Run a line of glue in the seam.

Line up the edge of the third piece and hold them all together. Better pictures coming up.

Run the line of glue in the pinched seam.

See it?

Add the third piece to the seam and hold.
Repeat, repeat, repeat and before you know it, voila! 


All glued together!

So fun to make!

I love the design.

Uniform + repetition = Happy
The final step is to paint the piece, if you want. The organic color of the rolls is kinda fun too but I wanted mine to be black. 


In the garage, I set up my spray paint station and got to work. I love Rustoleum spray paint. This summer, I invested in the most amazing tool ever, a spray paint "sprayer" handle. LOVE, LOVE, LOVE this tool! 
No more sore fingers, thumbs and hands when spray painting!
Funny, it looks like there is some areas not painted but really it's all covered really well.
 Paint and let dry. I left it to dry 24 hours. Then, hang it up! That's it.


So, what do you think? Not too shabby if you ask me. I still have pieces leftover and am already brainstorming what I can do with them. If you give it a try, I'd love to see your projects.

Monday, July 16, 2012

Feeling Boxed In


From time to time, I get that "boxed in" feeling. Is it always rational? No, but always bothersome. Today I get to go play with the most amazing little people. They belong to one of my dear friends from college. Since they live almost an hour away, that meant being an early bird. Now, I don't know about you but I do a lot of thinking during those quiet hours of the morning before the rest of the house has roused. This morning was no different. Lather, rinse and repeat was married with think, think, think. TMI? Perhaps, but in the shower my brain seems to come alive. Some people sing in the shower, I think, plan and sometimes even plot. ;) 


On to the point of this post. I was thinking about blogging. During the summer, I finally have time to catch up on things I love, like reading other people's blogs. The more blogs I read, the more I want to read and the more I want to write about on my own. This train of thought brought me to the name of my blog. Actually, I've been thinking about it for some time. The name "Inspiration, Imagination and Implementation" (3-I) is great, don't get me wrong but it also made me feel "boxed in." Mental? Yeah, probably but hey, who doesn't feel crazy from time to time. So, then I had a problem. What should the name of my blog be?! All of a sudden, I thought "Imagine the Possibilities." That could work! I don't have to write about all things DIY/Craft/Home Improvement with a title like this. I realize the previous 3-I title didn't mean everything had to be about those topics but it sure did lend itself to just those topics.


So, what might you read about in posts to come? Imagine the possibilities...

Tuesday, July 10, 2012

(Paint) Chips Ahoy!

Sea Green to Gray Area or seafoam to battleship gray one might say. Ahoy! Okay, that's about the extent of the sea or Navy analogies for this post...although, I like to keep my options open.

You've seen the pictures. The green has to go, don't ya think? Me too! I'm so glad we think alike. Now, let's get our therapeutic painting on. What...we're not thinking alike anymore? Hmm, I LOVE painting. Seriously, it's therapeutic for me and I don't hold it against you if you don't feel the same way. You'll come to your senses soon. ;) 

In my rush to get the bathroom painted before Sister-n-Crew arrived for spring break, I still took the time to snap pics to document the transformation. Even if for nothing other than my own self enjoyment of looking back at the accomplishment and thinking, "Wow! This is AMAZING!" You know you do it too. I hear you chuckling to yourself! 

First things first. A girl must gather her tools for the job. I tried using a tip I found on Pinterest where the paint tray is lined with foil for easier clean up. Well, about 1/2 a roll of foil later, it worked! I will use this trick again, but with wider foil. Another MUST HAVE for me is the trim tool. It makes all the difference when it comes to cutting in around baseboards, window casings, the ceiling, just about anything you don't want to paint that has straight lines.

Yes, those are gloves. I like to wear gloves to keep my hands clean. I use these gloves to garden too. They're superhero gloves. I can pick up worms with them on. :)
Now, it's time to get dirty! Okay, not so much being that we're wearing gloves. ;) I am a little "OCD" in my painting approach. I almost always paint from left to right. It's just a thing I do. Cutting in the trim is typically my first point too but I didn't have a new pad for the trim tool and was too impatient to go to the store to get a new one so I decided I would do it last. Totally stepping outside my box on this one! On your marks, get set, ROLL!

See the neighbors house? Neat, huh?
And roll some more...


Keep it up, you're doing fine!


We're still going. This space isn't feeling so small now is it?


I love how the gray looks. Fast-forwarding to the next day to work on cutting in the edges.

Edging = crisp, finished look


New shower curtain.

I didn't papparazzi the bathroom light fixture change out. Now, how did that happen?

As I've said, this bathroom project has been on-going. See how Hubbs and I have been living "around" my project?


The accent colors for the bathroom are white, aqua/teal/blue-green and of course, black. Every room needs a touch of black.

Okay, so the paint is done now right? Nope. Not when it comes to me and paint. I plan to do a "watermark" technique to make an accent wall. First try = fail so I've hashed a new plan and will post about it soon.

Sunday, July 8, 2012

Wedding Bag

A wedding. The joining of two great things...paper and adhesive...I mean...a loving man and woman. It's been awhile since I've gone to a wedding and when we received the invite I was ready to break out the craft supplies! All I needed....an inspiration. So where would I go but Pinterest.

I can always count on Pinterest to get the old creative juices flowing. Perusing late one night, I came across a really great "Card Organizer" made of cardboard, cardstock, and ribbon. I'm totally "scrap-lifting" that ran through my head faster than a 10-year old on a soapy slip-and-slide. As with all my projects, I needed to let the ideas swirl around in my head for a bit. 

Complete Project at: http://becreativewithamy.wordpress.com/2009/12/21/card-organiser-tutorial/
The color palette I decided on was black and white. Classic right? Elegant? Regal? All things worthy of a wedding motif. I have to give tons of credit to Hubbs. I drug him to the craft store to find "the perfect black and white wedding paper." Easy? Um, NO! The only black and white wedding paper was text laden. Not exactly the feel I was going for. All of a sudden, it was like I was in the toothpaste aisle..."All I want is toothpaste!" I was moving so fast from paper to paper (remember Hubbs? Well, he's an in-and-out-with-what-we-need kind of shopper...time would run out soon!). Just as I was ready to throw in the towel, Hubbs carefully slides a Stack-Pack of black and white paper in my line of sight and says, "This may not be what you're looking for, but it has black and white paper. It's not wedding but I thought I'd show you." Don't you love his approach...this may not be what you're looking for...genius I tell you! At that very moment, the clouds parted, sun streamed through the windows and he was encircled in light....my Savior! Do you think he knows how often he'll be going to the craft store with me from now on?

The paper he found was just right. I love that many of the pages have a velvety texture. How perfect is that for a wedding? That's what I thought. Now the real fun began...

Isn't it pretty? (Don't mind the creativity covering the table in the background. ;) )
Since I had not made this particular bag before, I decided to follow instructions for cuts, scores, everything, as written. The result? Not too shabby although I did find places where pieces just didn't fit the way I wanted them to and made slight adjustments.

The text laden wedding paper made a perfect liner for the inside of the bag body.
Accordion side secured with beautiful ribbon.
A few embellishment pearls and plaque and it's done! 

Absent but Never Idle

School's out for summer!! Everyone now, "School's out forever..." As a teacher, school being out means I have some time to pursue my favorite past times, all things crafty and home improvement. Here's what I've been up to while I've been absent from blogger-space.

Over spring break, Sister brought her family from Michigan for the week. It was a great time! We went here, there and everywhere in between, including the cozy little master bathroom in my house. Wait, what? you ask. I got a whim to change the decor, which isn't surprising. I've painted every room in our house at least twice. So, when I told Hubbs I wanted to paint the bathroom over spring break, he knew what he was in for. Or...did he?

Thankfully, I married a very easy-going man who has put up with living with home improvement supplies in his way; jobs left in various states of completeness as I wait for drying, school to get out or inspiration to return. I just love him! Since the bathroom is an on-going project, I'll post pieces as I go.

Okay, ready, set....the before pictures.

Light green paint adorns this small space.

I know you're wondering, what's out that window? Our neighbors kitchen window of course! Hi Neighbor. Oh, you're washing dishes. I'm, umm...I've gotta go!"

Small oak vanity. Let me tell you, the banjo design of this vanity with the shelf over the back of the toilet...not a great idea designer. Repairs to the toilet means hiring a contortionist to get the job done. We're lucky enough to have one of these in each bathroom!

View from the throne. Like I said, it's a very small space but works.

Open bulb vanity bar...jealous? No, really...you can have it if you want it.

Okay, so, that's it in a nutshell. Tiny bathroom in desperate need of entering 2012. See why I wanted to tackle it over spring break?

Monday, February 6, 2012

Lasagna Cups

Dinner anyone? 


Who doesn't love lasagna? It's a complete comfort food. Noodles, cheese, tomato sauce, herbs...did I mention cheese? Warm, browned, delicious cheesiness. Oh how I love those browned cheesy bits. I decided to try making lasagna cups the other night figuring they would be quick and delicious. Lil' Miss decided she wanted to cook with me and who am I to turn down an aspiring chef. Plus, more hands make less work. So, off we went to make our lasagna cups.

We started off with spraying the muffin pan with cooking spray. We used an organic olive oil. The first layer of wonton wrappers were next, one per muffin cup. In a separate bowl, I mixed 1 1/2 cups ricotta cheese with about 2 tsp Italian Seasoning (I'm a firm believer in approximation measurement in cooking), 1 tsp garlic powder and 1/4 tsp salt. Mix these well so each cup will have all the seasoned goodness.

In the meantime, Lil' Miss browned 1lb. ground beef and added 1 jar tomato, garlic and herb spaghetti sauce. Our tummies were in growling double time by this point!

Once the meat mixture was ready, it was time to assemble. Here's the pattern:

1 wonton wrapper
1 mini-scoop ricotta mixture
1 tbsp meat and sauce mixture
2nd wonton wrapped (rotated 1/4 turn to the first...think a diamond on top of a square)
1 mini-scoop ricotta mixute
1 tbsp meat and sauce mixture
sprinkle of mozzarella

Bake for 10-15 minutes at 350 degrees.

Our sauce was pretty juicy so we baked 15-18 minutes to ensure the wonton wrappers were cooked all the way through. The edges will get quite brown...but we love those browned bits right?!

2-3 per person and you're set to enjoy. :)